Thursday, December 20, 2012

Bacon Jalapeno Cheese Ball


Ingredients

  • 8 ounces cream cheese, room temperature
  • 1/2 cup shredded cheddar cheese (4 ounces)
  • 2 tablespoons chopped cilantro
  • 1 clove garlic, minced
  • 1/4 teaspoon ground cumin
  • Pinch of cayenne
  • 1 teaspoon lime juice
  • 1/2 teaspoon Worcestershire sauce
  • 2 jalapeños, stems and seeds removed, diced, divided
  • 6 pieces cooked bacon, crumbled, divided (about 6 ounces)
  • Salt to taste
  • 1/4 cup chopped pecans, roasted
  • Crackers for serving

Directions

  • Mix together the cream cheese, cheddar cheese, cilantro, garlic, cumin, cayenne, lime juice, Worcestershire sauce, half of the diced jalapeños and half of the crumbled cooked bacon. Taste and adjust seasonings and add salt.
  • Place the roasted pecans and remaining diced jalapeños and bacon on a plate. Stir together so well mixed. With your hands, roll the cheese mixture into a ball, then place on the plate and roll in the jalapeños, bacon and pecans until covered.
  • Chill covered for at least an hour before serving. Serve with crackers.
Pin It

Monday, December 10, 2012

Traditional Ginger Snaps

At work every year before Christmas we have a "grazing" table where we all sign up to bring munchies to share with everyone else.  Today was the first day and I chose to bring Ginger Snaps. These are quite delicious and I have to say it's a good recipe.  Your family and friends will enjoy them as well.  As always, Bon Appétit!


Ginger Snaps

Yield: 2 to 3 dozen cookies

Prep Time: 10 minutes | Cooling Time: 30 minutes

1 cup sugar
1/4 cup molasses
2 teaspoons baking soda
1/2 teaspoon cloves
1 egg
2 cups all-purpose flour
1 teaspoon ginger
1 teaspoon salt
1 teaspoon cinnamon
3/4 cup shortening

Mix all ingredients.  Roll into balls, then roll in sugar.  Cook on top rack in 350 degree oven for 8-10 minutes. Pin It

Saturday, November 24, 2012

Rolled and Stuffed Turkey Breast

This Thanksgiving I wanted to try something different which is nothing unusual, it seems I'm always wanting to try something different!  So, I came across a recipe that called for deboning a whole turkey, pounding it, stuffing it and rolling it!  Sounded like something right up my alley!!

I decided to use a turkey breast instead of a whole turkey and when I went to Kroger to shop, found absolutely no deboned breasts in sight, nor any deboned whole turkeys.  So, I asked the butcher if he would debone a breast for me and he willingly obliged.  Yeah! 

I left the store with great anticipation of the next day when the recipe would all come together.  And boy did it! 

It was actually not that difficult to accomplish and the end result is quite delicious and elegant!!  I think the recipe is a keeper, for sure, and something I'll definitely try again in the future - probably next Thanksgiving!!

Bon appétit!!

1 (8-9 lb.) turkey breast (or 12-14 lb.) whole turkey - deboned
3 tablespoons olive oil

1 medium onion, coarsley chopped
3-5 medium garlic cloves, minced
3 tablespoons fresh rosemary, chopped plus
3 sprigs fresh rosemary
1 tablespoon fresh sage, chopped
1 tablespoon Dijon mustard
1 lb. ground turkey
1 lb. ground pork
1 cup dried breadcrumbs
3 large eggs
1/2 cup heavy cream
3 1/2 teaspoons salt
1 3/4 teaspoons fresh ground black pepper
1/4 cup maple syrup

Heat oven to 375 degrees.

In a skillet, saute onion, garlic, 1 tablespoon chopped rosemary, sage, and mustard on 1 tablespoon olive oil over medium heat.  Cook for 10 minutes, stirring occasionally, until onion is soft and transulcent but not brown.  Transfer to a large bowl and set aside to cool.


Add the turkey and pork, breadcrumbs, eggs, cream, 1 1/2 teaspoons salt, and 1/4 teaspoon pepper.  Stir to combine.


Lay turkey on a work surface, skin side down.  Pound down as much as possible.  Season with 1 teaspoon salt, 1/2 teaspoon pepper, and remaining 2 tablespoons chopped rosemary.

Place stuffing in the middle of the turkey meat.  Roll turkey up closing skin over stuffing, securing with wooden toothpicks or skewers to hold into place.  Tie every 2 inches with kitchen twine.

Drizzle with remaining 2 tablespoons olive oil.  Season with remaining teaspoon salt and 1/4 teaspoon pepper.  Tuck rosemary branches along the top of the roll under the twine.  Place on roasting rack over a large pan.

Roast turkey until thermometer registers 150 degrees, 2 to 2 1/2 hours.

Remove from oven, brush with maple syrup and return to oven for additional 20 minutes, or until thermometer reads 160-165 degrees.  The maple syrup glaze will give the roll a wonderful rich color.

Remove from oven and let rest for 10 minutes.  Transfer to a cutting board, remove twine and rosemary, and cut crosswise into 1/2 to 1-inch slices.


Pin It

Sunday, November 11, 2012

Steak and Ale Pie

While vacationing in Scotland in September, we came upon the most delicious Steak and Ale Pie at the Glenuig Inn.  And as is my customary thing to do, I am trying to recreate that dish.  I have to say the flavors were wonderful and the filling almost perfect but not enough beef for my liking. 

This recipe is pretty darn close and is actually, I think, even better.  Alot more "goodies" in the pie and alot more flavorful!  Try it and see if you like it as much as I do!

2 pounds stew beef, cut into small pieces

1 onion, diced
3 carrots, diced
2 potatoes, diced
8 oz. mushrooms, sliced
2 cloves garlic, minced
1 1/2 T. fresh thyme (or 1 1/2 t. dried)
1 T fresh rosemary (or 1 t. dried)
1/2 t. paprika
1 container Knorr Homestyle Beef Stock (condensed)
1 1/2 bottles beer (you know what to do with the rest of the beer)

1 T. flour
1/4 C. Half and Half
3/4 C. frozen peas
1 sheet puff pastry, thawed
1 egg, beaten
olive oil
salt and pepper


In a large Dutch oven, heat a healthy drizzle of olive oil over medium heat.  Add beef and brown on all sides.  Remove beef from pan and set aside.

Add onion, carrot, and potatoes to the pot.  Cook over medium heat until tender. Add mushrooms and garlic and cook another 5 minutes longer.  Add thyme, rosemary, and paprika.  Add a sprinkle of salt and pepper. 

Return beef to the pot and add container of Knorr Homestyle Beef Stock and beer.  Stir to combine and bring to a low simmer.  Cover the pot and allow stew to simmer until beef is very tender, about 1 1/2 to 2 hours.  Shred beef and return to pot.

In a small bowl, whisk together Half and Half and cornstarch. Pour into pot and bring to a simmer.  Cook until thickened a bit, about 5 minutes.  Stir in frozen peas and remove from heat.

If making individual pies, pour filling into 4-6 individual-sized baking dishes.  (If making one large pie, pour into an 8" x 8" baking dish.)  In a small bowl, make egg wash by whisking egg with 1-2 teaspoons of water.

Roll puff pastry out slightly and brush with egg wash.  Cut pastry into 4-6 squares, large enough to cover each baking dish.  (If making one pie, don't cut.)  Place pastry over each baking dish.  Use a sharp knife and make a few slits in the pastry to allow steam to escape while baking.

Place on a cookie sheet and bake at 350 degrees for 25-30 minutes or until golden.  Makes 4-6 individual pies or one 8" x 8" pie.

Pin It

Monday, November 05, 2012

Crusty Homemade Bread

Yum, yum!!


I came upon this recipe on Pinterest but have altered it a bit in my attempt to recreate the wonderful bread served during all meals at the Glenuig Inn in Scotland. This Inn is one that my friend Camille and I visited on our recent kayaking adventure in Scotland. 

The bread at Glenuig Inn is actually made with Organic Malt House Bread Flour, which is not obtainable in the U.S.  Or if it is, I haven't found a source yet but will continue to search.  And I cannot find any vendor in the UK who will ship it!

In the interim, I substituted a mixture called Granary Flour.  To make this, I combined 2 cups King Arthur unbleached white whole wheat flour, 6 ounces King Arthur bread flour, and  6 ounces King Arthur cracked wheat. 

Then, I used this blend in the following recipe:

2 cups unbleached all-purpose flour
1 cup Granary Flour
1 3/4 teaspoons Kosher salt
1/2 teaspoon yeast
1 1/2 cups water

In a large bowl, mix flour, salt, and yeast with whisk until thoroughly combined.  Add water stirring until you achieve the delightful "shaggy mess" look. 

Cover with Press 'n Seal wrap and place on countertop for 12-18 hours to proof the dough.  Do not refrigerate!


When the time is up, preheat the oven to 450 degrees.  When the oven is preheated, place your cast iron baking pot (with lid) in the oven to preheat.  You can use a Le Creuset or cast iron Dutch oven.  I''m using a cast iron Dutch oven.

Dump the dough onto a well floured surface.  Shape into a round ball.  Cover with the Press 'n Seal and let rest 30 minutes while the pan is heating.  Once heated, place the ball of dough in the pan, cover with the lid, and place in the hot oven.  Bake for 30 minutes.  Remove lid and bake another 15 minutes.  Remove from oven when done, and remove from pan.  Place on wire rack to cool.

This is very close to that served at Glenuig Inn.  But I thought I'd try another loaf.  This time I simply used 3 cups of unbleached all-purpose flour, adding 1/4 cup cracked wheat and 1/2 teaspoon Organic Barley Malt, the salt, yeast and water.  Perfect!  I believe this is the closest I will get and it is very delicious!


3 cups unbleached all-purpose flour
1/4 King Arthur cracked wheat
1 3/4 teaspoons Kosher salt
1/2 teaspoon yeast
1/2 teaspoon Organic Barley Malt
1 1/2-3/4 cups water (add enough to make the dough a shaggy mess!)


You can add flavorings to the dough before the proofing step - ie Rosemary, Lemon and Gruyere, Garlic and Parmesan Cheese, Cranberry Orange and Almond, Cheddar and Bacon, Chocolate Chip and Walnut, etc.  Or toppers like King Arthur's Artisan Bread Topper or their Everything Bread and Bagel Topping.  Or add other whole grains to the dough.  The possibilities are endless.  Just use your imagination.  I do not think this recipe will disappoint!


The shaggy mess!

The ball of dough resting.

Into the cast iron dutch oven, remember the lid!

Fresh from the oven!

Cooling on a wire rack.


Pin It

Sunday, November 04, 2012

Shrimp and Grits

I've made this recipe a few times now and after the very first time, determined that this would be my "mainstay" Shrimp and Grits recipe.  It's really easy to pull together in a short period and the grits are different in that it's really a grits souffle.  Really flavorful, as well, which is why its such a delicious dish.  And I like my shrimp separate from the grits which is why I think this dish is just perfect!
Try it, you'll feel the same, I'm sure!


Pan-Seared Shrimp and Grits Soufflé with Corn, Chives and Peppers


1-1/2 pounds (12 to 15 count) shrimp
kosher salt and freshly ground black pepper
garlic powder, for seasoning
3 tablespoons unsalted butter, divided, plus more for ramekins
1 teaspoon minced garlic
1-3/4 cup heavy cream, divided
1/4 cup quick-cooking grits
1/4 cup cooked ham, diced
1/3 cup corn
2 tablespoons well-drained and chopped roasted red peppers
2 tablespoons chopped chives
2 large eggs, lightly beaten
1/8 teaspoon ground nutmeg
1/2 cup grated Parmesan
2 tablespoons extra-virgin olive oil
Chives, corn, ham, red peppers.

Add to grits and cream mixture.
Grits souffles before heading into the oven.
    Pan searing the shrimp.

  1. Peel and devein the shrimp, leaving the tails attached. Rinse under cool water and pat dry with paper towels. Place the shrimp in a single layer on a baking sheet and season both sides of each shrimp with a little salt, pepper and a sprinkle of garlic powder. Refrigerate uncovered for 30 minutes.
  2. Preheat the oven to 325 degrees. Butter four 4-ounce ramekins and set aside. In a small saucepan over medium heat, melt 1 tablespoon of the butter. Add the garlic and cook for a few seconds. Add in 1 cup of the cream, some salt, a few grinds of pepper and bring to a boil. Add the grits, reduce the heat to low and simmer, stirring frequently, until thick, about 5 to 8 minutes. Remove from the heat to cool slightly. Stir in the ham, corn, peppers and chives. In a large bowl, combine the remaining 3/4 cup cream, the eggs, nutmeg and Parmesan. Season with a little salt and pepper. Gently fold the grits mixture into the egg mixture until combined and evenly divide among prepared ramekins. Place the ramekins in a roasting pan, place in the oven and pour enough hot water to come halfway up the sides of the ramekins. Bake until a toothpick or skewer comes out clean, about 25 to 30 minutes. Allow to cool for 5 minutes, then run a knife around the edge of the ramekin and invert onto a serving plate.
  3. In a large sauté pan over medium-high heat, bring the olive oil to shimmering. Add the shrimp and cook for 2 to 3 minutes. Flip the shrimp and cook until shrimp are rosy pink and firm to the touch, about 2 minutes more. Transfer the shrimp to a bowl. Melt the remaining 2 tablespoons of butter in the hot pan, add the shrimp and toss to coat. Remove the pan from the heat and serve immediately.
Pin It

Saturday, October 20, 2012

Fat Balls

In the Greyhound adoption world, it is more likely the case that our adopted Greyhounds have become a bit overweight which presents an entirely different set of problems for the adopter.

But sometimes there are those Greyhounds who are "hard keepers" which means weight is hard to keep on them.  They require a bit more food per meal and sometimes that is not even enough.    

A wonderful, healthy way to get some weight on a Greyhound is to feed them something called "Fat Balls".  These are fed raw and most require about 4-5 balls per meal, however, as the recipe indicates, you can feed up to 10 per meal.  These are fed in addition to their normal kibble or you can feed alone as a meal.

Here is the recipe. Again, DO NOT COOK!

Fat Balls

2 lbs. raw hamburger (the cheaper and fattier, the better)
3 or 4 raw eggs
1 c. peanut butter
1/2 c. Karo syrup
1 c. wheat germ or 1 c. oatmeal

Dump it all into a large bowl and mix it together with your hands.  Form it into balls about the size of a ping-pong ball, and feed up to 10 meatballs per serving.  Freeze until served. It's better served raw to preserve all the fat.
Pin It

Friday, October 19, 2012

Pumpkin Pie Bites


Tis the season to make wonderful treats!  I made these for a work function the other day although I failed to have the time to make the pumpkin faces on all of them!  It is a very cute idea though.  And these are very tasty morsels!! 

You really won't be able to eat just one!

As Julia would say, "Bon Appétit"!

2 refrigerated ready-to roll pie crusts

8 oz. cream cheese, room temperature
1/2 cup sugar
1 cup canned pumpkin
3 eggs
1 teaspoon vanilla
1 teaspoon pumpkin pie spice
Pumpkin-shaped cookie cutter


Optional
1/2 cup chocolate morsels
vegetable oil
re-sealable plastic bags

Preheat oven to 350 degrees.  Use cookie cutter to cut 12 pumpkin shapes from each pie crust. You will need to roll the dough thinner than it comes out of the box.  Press dough shapes into a 24 cup mini muffin tray. (Make 12 at a time, alternating cups to make sure pie crusts don’t overlap each other.)

Apply egg whites from one egg to the top edges of each pie.  Mix cream cheese, sugar, canned pumpkin, remaining 2 eggs, vanilla and pumpkin pie spice together until thoroughly combined.
Spoon mixture into each pumpkin-shaped pie crust.  Bake for 12-15 minutes. Remove pies to cool and repeat with second pie crust. Place the muffin tray in the freezer to cool it quickly for re-use.

Makes 24 pies. Keep refrigerated.

To decorate, melt chocolate in a heat-proof bowl in the microwave on medium. Heat in 30 second intervals, stirring in between until melted. Add a little vegetable oil to make the chocolate more fluid. Transfer to a re-sealable plastic bag and cut the corner off. Drizzle or draw faces on pies.

Note: The cutter I used was 3 3/4 inches wide, but if you don’t have one, don’t worry. Just use a round cutter around that size or slightly smaller to cut circle shapes out of the dough. Then make stems with the scraps. Press each stem over the edge and down the side of the dough before filling.

Pumpkin pie spice is a mixture of cinnamon, ginger, nutmeg and allspice.

Enjoy! Pin It

Thursday, August 30, 2012

World's Most Perfect Dessert!


Yes, the chocolate covered strawberry is the world's most perfect dessert.  It encompasses chocolate (and who doesn't love chocolate?) and strawberries (and who doesn't love strawberries?) and it's so fast and easy to accomplish. 

In just a few minutes, you, too can whip up these special delights for your family, love of your life, or as is the case with me (sad to say), your co-workers!!  Ideally you will want to make these the day they are to be served.

I start with the biggest, freshest strawberries I can find.  Usually Sam's Club has some beauties but lately I have found the best ones at my local grocery, Kroger.


I then melt almond bark, purchased from the same grocery, Kroger, and located on the isle where baking supplies can be found. 

Depending on how many strawberries I have will depend on how much of the bark I melt.  I usually use the microwave to melt it and do it in 1-2 minute increments, stirring in between, to be sure it doesn't burn.


I use white almond bark and chocolate almond bark and dip strawberries in either.  Immediately after dipping, decorate with crushed peanuts, candy sprinkles or flaked coconut or drizzle with the opposing color almond bark.  Let dry on parchment paper.  Store in a cool, dry location
.   

It's truly so easy and so decadent that the recipient of the fruits of your labor will honestly think you spent all night in the kitchen when, in fact, it was only minutes.

As Julia would say, "
Bon Appétit"! Pin It

Tuesday, August 28, 2012

Kaytucky Chicken


Recently I found this recipe on Pinterest through someone's blog who had posted a different recipe, I believe.  In any event, I tried it and found it quite easy to do, quite delicious, and really quite fast.  A very satisfying recipe, to be sure. 

I recommend you try it.  Don't be afraid of the puff pastry like I was, it's amazing how it bakes and truly "puffs" around the chicken roll. 

This dish will also surely impress your next dinner guests and without all the usual effort!  It's definitely a keeper!


Kaytucky Chicken
From Kayotic Kitchen - she has some great pics of each step as well!

4 chicken filets
4 frozen puff pastry sheets
4 oz cream cheese (the firm kind)
few rashes of bacon
flat-leaf parsley
1 spring onion
1 large egg
pepper
salt

Directions:
  • Cook up your bacon (I used pre-cooked to save some time).
  • Chop up spring onion and parsley.
  • Add the spring onions, parsley, crumbled up bacon and a good pinch of pepper to 4 oz firm cream cheese.
  • Mix it all up. Adding a little garlic, chili pepper and/or grated cheese also tastes great!
  • Make a fairly deep cut in each chicken fillet. And spread 1/4 of the cream mixture in there.
  • Place the chicken on top of the puff pastry, with the cream cheese side down. Season the chicken with a generous amount of salt and pepper.
  • Beat a large egg, and brush a little on the edges of the puff pastry.
  • Just fold them until you end up with small packages. The egg will function as a glue. Lightly brush the top of the puff pastry with the egg as well.
  • Pop them in a preheated oven, and bake at 400F (200C) for 30 to 35 minutes.
Pin It

Wednesday, August 22, 2012

A Quickie Appetizer


Bacon Wrapped Pepperjack Shrimp

Are you on a tight schedule with little time to spend preparing an appetizer?  Well, this one will do in a flash - trust me.  Just take raw, peeled and deveined shrimp with the tails on, add a small cube of frozen pepperjack cheese, and then wrap with a 1/3 of a strip of slightly cooked bacon.  Secure with a wooden toothpick.

Cook in a 400 degree preheated oven for 10-15 minutes until the bacon and shrimp are cooked through. 

Yum yum!! Pin It

Tuesday, August 21, 2012

The Crab Cake


The other evening I decided to make Crab Cakes using some of my homemade mayonnaise.  I have routinely used Tyler Florence's recipe but decided to try one I had from the Atlanta Fish Market.  I've searched on the Internet for their recipe and it appears to be a bit different than the one I have in that the current recipe calls for more bread crumbs (about a cup and a half more) and even more mayonnaise (1 cup more), more seasonings and more eggs but the same amount of crabmeat.  You can find that recipe here.

After making the recipe I had, I have to think the one I have is a bit better and has less "filler" which is the part I like.  I cannot tell you how long I've had this one but it's been many years. 

So, my suggestion to you?  Why not try them both and feel free to post back here with your recommendation.  Here is the older recipe:

Atlanta Fish Market Crab Cakes

1/4 teaspoon cayenne pepper
1/2 teaspoon white pepper
1 teaspoon kosher salt
1/2 teaspoon dry mustard
1 teaspoon Worcestershire sauce
1 teaspoon lemon juice
1/2 teaspoon Old Bay Seafood seasoning
1/3 cup mayonnaise
1/2 cup soft bread crumbs (I used Panko break crumbs)
1 egg
1 pound lump crabmeat (picked through to remove any loose shells)
1 1/2 teaspoon olive oil
4 lemon wedges

Preheat oven to 350 degrees.  Combine cayenne, white pepper, salt, dry mustard, Worcestershire, lemon juice, Old Bay, mayonnaise, bread crumbs and egg in a large bowl and mix until thoroughly combined.  Place crabmeat in another large bowl and gently fold egg mixture into crabmeat, being careful not to break up large crab pieces.  Shape into four crab cakes.

Heat olive oil in a large skillet over medium high heat.  Add the crab cakes, in batches if necessary, and cook until lightly browned, approximately 1 minute on each side.  Transfer crab cakes to a sheet pan and finish cooking the crab cakes in the oven until heated through.

Serve with lemon wedges and Joe's Mustard Sauce on the side.

Joe's Mustard Sauce

1 tablespoon Coleman's Dry Mustard, or more to taste
1 cup mayonnaise
2 teaspoons Worcestershire sauce
1 teaspoon A-1 sauce
2 tablespoons light cream
salt

Place the mustard in a mixing bowl or the bowl of an electric mixer. Add the mayonnaise and beat for 1 minute.

Add the Worcestershire, A-1, cream, and a pinch of salt and beat until the mixture is well blended and creamy. If you'd like a little more mustardy bite, whisk in 1/2 teaspoon more dry mustard until well blended. Chill the sauce, covered, until serving.
Pin It

Monday, August 20, 2012

Ah . . . Heaven!!


Yes, heaven, I said!  Homemade mayonnaise that is as good for you as the healthiest mayonnaise at the grocery store.  I've tried making mayonnaise in the past and was unsuccessful so I thought I'd give it another whirl and this time - much success!!  Here is the recipe and you must follow it to the "T"!!

Paleo Mayonnaise

2 eggs

2 cups light tasting Extra Virgin Olive Oil (I used Bertolli) or walnut oil
2 tablespoons apple cider vinegar
1 teaspoon prepared yellow mustard

1 teaspoon sea salt
1/3 teaspoon cayenne pepper

In a blender (or using a hand mixer), add the eggs, vinegar, and mustard and blend together well – leave the blender running and slowly slowly slowly drop by drop or very slow drizzle add the oil.  BE PATIENT!!  Do not dump all the oil in quickly and give up!! 

When the mixture begins to emulsify or thicken, only then can you be a bit faster about pouring in the olive oil but still take your time.  Turn the blender off once all the olive oil is in and the mayonnaise is thickened to your desired consistency.  Add the salt and cayenne pepper and mix well or blend again for another few seconds. 

Now for the fun part – variations!!!  Always wait until after your mayonnaise is thick before you add seasoning but here is when you can get creative.  Add dried of fresh dill, fresh basil, or cilantro, garlic and onion, hot sauce, or even curry powder to make your own spreads, sauces and dips for just about everything.

The mayonnaise will keep in the refrigerator for about a week.  You can also half the recipe to make a smaller batch.  Ratio of eggs to oil is always 1 to 1 cup.  Other than that, you can experiment to find the exact combination of flavors to satisfy your taste buds!
Pin It

Thursday, July 19, 2012

Chicken and Spinach Pasta Bake

Last weekend I traveled to my hometown, Panama City, to visit with family and do some R & R which included a day of kayaking to Crooked Island Sound.  On Friday night, my niece made dinner for us which was this most awesome Chicken and Spinach Pasta Bake.

I decided to try it last night  and boy, is it just the most delicious dish!  Paired with a Cesar salad and french bread, you just can't go wrong!!

Chicken and Spinach Pasta Bake
  • 8 oz uncooked rigatoni
  • 1 T olive oil
  • 1 C chopped onion
  • 1 C chopped fresh mushrooms
  • 1 (10 oz) pack fresh spinach, cooked and drained
  • 3 C cubed, cooked chicken breasts
  • 1 (14 oz) can Italian-style diced tomatoes, undrained
  • 1 (8 oz) container Philadelphia chive and onion cream cheese
  • ½ t salt, ½ t pepper
  • 1½ C shredded mozzarella cheese
Prepare rigatoni according to pkg directions.  Spread oil on bottom of 11×7 in baking dish; add onion and mushrooms in a single layer.  Bake at 375 for 15 minutes or just until tender.  Transfer to large bowl, set aside.

Drain spinach well, pressing between paper towels, chop as well.  Stir in rigatoni, spinach, chicken, and next 4 ingredients into onion and mushrooms in bowl.  Spoon mixture into dish and sprinkle evenly with shredded mozzarella cheese.  Bake covered at 375 for 30 minutes; uncover and bake 15 more minutes or until bubbly.
Pin It

Wednesday, July 04, 2012

Frosty Paws

This morning I started the day off making the girls one of their favorite treats - Frosty Paws.  To make these for your four-legged family members, in a blender mix one 32 ounce container vanilla yogurt, 2 bananas, 2 tablespoons peanut butter, 1 tablespoon honey.  Pour into containers (these are 2 ounce portion cups I purchased off Amazon.com) and freeze until firm.

On a hot summer day, why not treat your pups to these wonderful frozen desserts which are also very good for them as well!! 
Pin It

Monday, May 07, 2012

White Chicken Enchiladas

In honor of Cinco de Mayo which was this past Saturday, May 5th, last week I made some delightful White Chicken Enchiladas.  Finished the last one today and oh, how yummy they were.  I'll definitely have to make these again in the very near future!

Of course you must serve with your favorite Margarita!!


8 flour tortillas, soft taco size
2 cups cooked, shredded chicken
1/2 cup drained black beans
2 cups shredded Monterey Jack cheese
3 Tbsp butter
3 Tbsp flour
2 cups chicken broth
1 cup sour cream
1 (4 oz) can diced green chilies

Preheat oven to 350 degrees.

Spray a 9x13 pan with cooking spray. Mix chicken, beans and 1 cup cheese. Roll up in tortillas and place in pan seam side down.

In a small sauce pan over medium heat, melt butter.  Whisk in flour and cook 1 minute. Add broth and whisk until smooth. Allow sauce to thicken.  Remove from heat and stir in sour cream and chilies.

Pour sauce over enchiladas and top with remaining cheese. I also added a few sliced jalapenos on top as well.  Bake 20-25 minutes and then broil for a few minutes to brown the cheese. Pin It

Friday, May 04, 2012

Animal Assisted Activity (AAA) Last Night at D'ville Nursing and Rehab


Well, what a night it was!  I took Sami instead of Lucy, due to the storms.  Left Lucy shaking and panting on top of my bed!  Sami was happy to pinch hit for her, she always loves to go.  She is a good therapy dog if I can just keep her from kissing everyone she sees!

We visited with Warren, our African American gentleman who is bedridden and w
ho can’t speak.  We approached and I asked if he wanted to see Sami tonight and he nodded that yes, he did.  We moved to the bed and he slowly moved his hand from underneath the covers.  I helped put his hand on Sami’s head and he pet her for a bit.  When he was done, he slowly moved his hand back underneath the covers.   As I left the room, I looked back at him to say goodnight and he had a smile on his face.

We visited with a new elderly lady who when we approached and asked if she’d like to pet Sami, her response was, “I can’t, my hands are crippled”. She was reading a book and her hands, crippled as they were, formed perfectly around the book so it was not evident to me when I first came into the room.  She sounded so disappointed.  I immediately told her it was okay and I would help her so I did just that, taking her crippled hand and turning it over so that the back of her hand stroked Sami’s head.  She was quiet overjoyed and as I left the room, I looked back at her to say goodnight and she had a smile on her face, too!


After making our rounds around the complex, we finally ran into our favorite patient, known simply as “Bud”.  He was so happy to see her!  He just loved on her, kissing her head, and hugging on her.  He is such a pleasant man.  He walked us down the hallway and even outside to my vehicle.  I asked him several times if it was okay for him to be out and he said, yes, that he walked “everywhere” and even would walk down the street all the time for exercise.  I believed him.  He is a forgetful person but he doesn’t tell fibs!! 

We chatted at the vehicle for a bit, long enough for me to see a screw embedded in one of my back tires.  He told me to be sure to get that plugged and if anyone tried to give me grief or charge me for doing that, to come get him and he’d set them straight.  Bless his heart – he is absolutely so endearing and I only wish he had family and grandchildren around as he’d be the best granddaddy!  Anyway, as I was leaving the parking lot, I turned and waved goodnight and he, too, had a smile on his face!


It’s amazing what an hour of your time can do for people like Warren and Bud and our new favorite patient (I didn’t get her name).  It is such a rewarding experience, one which my Greyhounds and I have enjoyed now for nearly nine years!
  I am so thankful we can do this little bit of "therapy" to help so many!
Pin It

Saturday, February 18, 2012

That Didn't Last Long . . .

Well, that new "eating plan" didn't last all that long.  I really did miss grains but much more than that, I missed cooking!!  And you know how I love to cook!!  So, I am just trying to watch what I eat and when the days are nice, I am walking 2-3 miles a day.  Once Spring hits, that will be the norm every day. 

So, it was a rainy night tonight which meant no cooking on the grill.  I decided to make the most delightful Pan Fried Shrimp and Grits Souffle with Corn, Chives and Peppers.  Definitely not for the weak of heart (or for those on diets) but oh my goodness so incredibly delicious and worth every calorie!!

Here is the recipe.  Enjoy!

Pan Fried Shrimp and Grits Souffle with Corn, Chives and Peppers

1 1/2 pounds (12 to 15 count) shrimp,
deveined and peeled
kosher salt and black pepper
1 t. seasoned salt
1 t. garlic powder
1 t. Old Bay Seasoning
1 T. heavy cream
1 egg, lightly beaten
1 C. flour
Vegetable oil

1 T. butter
1 t. minced garlic
1 3/4 C. heavy cream, divided
1/4 C. quick cooking grits
1/4 C. cooked ham, diced
1/3 C. corn
2 T. well-drained and chopped roasted peppers
2 T. chopped chives
2 large eggs, lightly beaten
1/8 t. ground nutmeg
1/2 C. grated Parmesan

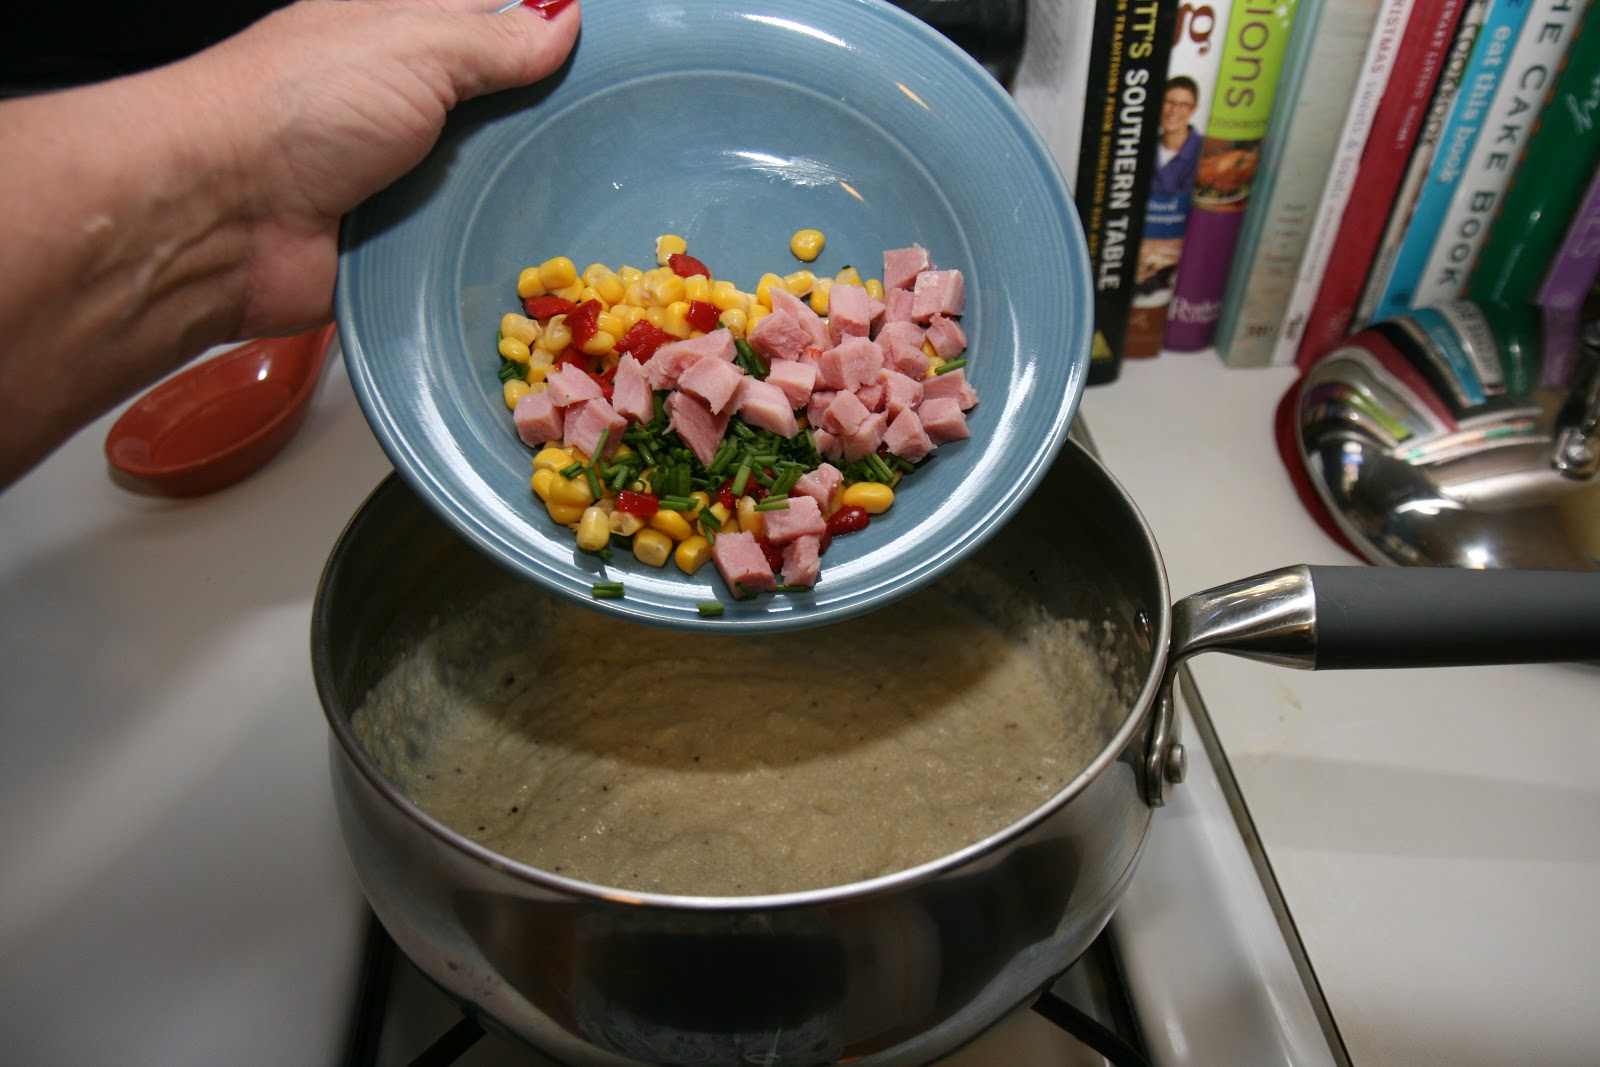
Preheat oven to 325 degrees.  Spray four 4-ounce ramekins with PAM and set aside.  In a small saucepan over medium heat, melt 1 tablespoon butter.  Add the garlic and cook for a few seconds.  Add in 1 cup of the cream, some salt, a few grinds of pepper and bring to a boil.  Add the grits, reduce the heat to low and simmer, stirring frequently until thick, about 5-8 minutes.  Remove from heat to cool slightly.  Stir in the ham, corn, peppers, and chives.

In a large bowl, combine the remaining 3/4 cup cream, the eggs, nutmeg and Parmesan.  Season with a little salt and pepper.  Gently fold the grits mixture into the egg mixture until combined and evenly divide among the prepared ramekins.  Place the ramekins in a roasting pan, place in the oven and pour enough hot water to come halfway up the sides of the ramekins.  Bake until a toothpick or skewer comes out clean, about 25-30 minutes.  Allow to cool for 5 minutes, then run a knife around the edge of the ramekin and invert onto a serving plate.

In a large saucepan, heat enough vegetable oil to cover shrimp when frying (about a half inch).  Add seasoned salt, garlic powder, Old Bay Seasoning, heavy cream, touch of salt and a few grinds of pepper to beaten egg.  Mix well.  Place flour in zip-loc bag.  Alternately coat shrimp with flour, dip in egg mixture, and then back into flour.  Add to hot oil and cook until lightly brown on both sides.  Move to paper towel lined plate to drain.

To assemble, invert ramekin onto plate, surround with pan fried shrimp.  Garnish with chopped parsley!  Enjoy!! Pin It

Monday, January 16, 2012

New Eats

With the new year I decided to change my eating habits eliminating grains and legumes, but not dairy so much at this point, concentrating on protein, vegetables, and fruit (mostly berries) - no processed stuff, clean eating basically.  It's sort of a cross between Paleo and Primal actually.  I do eat such little Dairy so it is definitely more Paleo than not.  A friend of mine has been a big inspiration in all this.  She has dropped 70 pounds just by changing what she eats and adding a workout routine.  That is truly inspiring.  Her husband has dropped some pounds as well, however, I do not know the amount.  Both look fabulous and feel fabulous!

So, with the new eating plan I've been trying new recipes.  Two that I've tried have been breakfast items.  One is called Egg Muffins.  These were good but they didn't particularly rock my boat.  Here is that recipe.

Egg Muffins


Ham and Egg Cups


Egg Muffins

10 -12 eggs whisked well
1 green onion, chopped
3 big handfuls of spinach
1/2 red pepper, chopped
6-8 slices of COOKED and crumbled bacon
sea salt and black pepper to taste

Preheat oven to 350 and grease with coconut oil two muffin pans. Whisk all your eggs in a big bowl. Add remaining ingredients.  Mix well. Using a 1/4 measuring cup, fill the muffin pans (you’ll be able to make 18-20 cupcakes).  Bake for 20-25 minutes or until the eggs are set in the middle.  Enjoy!

My most favorite new breakfast item are the Ham and Egg Cups.  You simply preheat your oven to 400 degrees.  Oil your muffin pan with coconut oil.  Line each muffin well with a slice of deli ham.  Crack an egg in each.  Top with a few leaves of spinach, then a tablespoon of shredded cheese.  I used a Colby and Monterey Jack blend.  Bake for 10 minutes or until set.  Serve!  I absolutely love these!!

I've also tried other recipes, most have involved nut flours ie almond flour and coconut flour.  There are others that are used in recipes and I think I've purchased every one of them.  Thus far, I've tried a biscuit and two buns for hamburgers.  None were palatable I must say.  My friend originally suggested that I stay away from the nut flours that nothing she had ever tried turned out all that good. I should have listened. 

There are two more recipes that I want to try that involved nut flours.  One is brownies and the other is pancakes.  I'll probably get to those this week so stay tuned! Pin It